The term eCommerce alludes to the way toward purchasing and selling merchandise and enterprises on the web, however as of late the shopping experience has reached out past that. For instance, retailers that have a physical area can join eCommerce by permitting clients to peruse on the web and get available.
In addition to allowing retailers to better serve existing customers in this global pandemic by making shopping easier for them, an online store can allow businesses to find totally new audiences — ones that may never enter their physical location, and an increased importance of online store and ecommerce can be seen. Independent retailers, small businesses, and large corporations can all benefit from incorporating eCommerce into their business strategy.
Here are a few benefits of running an eCommerce store:
24/7 shopping: Many eCommerce websites allow shoppers to peruse products and make buying decisions at any time, day or night. This makes shopping easier for customers, and that kind of accessibility is a huge competitive advantage. Plus, integration with social media allows businesses to take advantage of even more channels to engage with customers.
Widened scope: A physical store is limited to selling to customers who are in the area. Many eCommerce websites extend businesses to people all over the country or around the world, vastly expanding its customer base and potential revenue. Selling online also offers the ability to broaden or increase inventory — the number of items a business can sell online doesn’t need to be limited in the same way as a physical store, which might be a consideration to increase cash flow.
Purchase-funnel clarity: Currently, it’s nearly impossible to track how often a single customer comes to a physical store to browse before making a purchasing decision. However, an online store can track a customer’s every click, providing valuable insights into the purchasing process and paving the way for marketing opportunities (such as abandoned cart emails) to nudge customers who may be on the fence about purchasing.
Fear Of Missing Out (FOMO)
No one in this world would ever want to lose the control over their customers specially during this global pandemic and thus the importance of online store and ecommerce has been increased over time. People are looking for an online center to fulfill their day to day need and to be safe and get everything in hand at their door steps. And this is the time for stores to take a step closer to their customers and increase their online presence by entering into the ecommerce world. No one would want to go through the fear of missing out in this pandemic and get lost with their business and we are providing you an opportunity to be recognised in more wider picture and build an online relation with you existing and new customers.
To get started selling online, you’ll need to create an eCommerce website or shop for your business, list products, set up payments, and set up your online business operations (such as order fulfillment, shipping, sales tax, and more). Webiators has everything you need for eCommerce, so you can get up and running quickly and easily.
No design skills needed.We give you complete control over the look and feel of your website, from its layout, to content and colors. Buyers are conducting extensive research online before ever speaking to a sales person. Buyers are also making more direct purchases online and via their smartphone, never stepping foot into traditional brick-and-mortar locations. The internet makes doing business much easier and faster. It’s led to changes in the way people do business with a rapidly growing world wide trend towards online shopping or e-commerce.
So, have I given enough reasons to choose online shopping over conventional shopping? If you or your business are looking for an online shopping solution, feel free to contact Webiators.
The default Magento 2 permits adding columns of the product attribute. you can use the below code which is useful for optimized backend performance. Now let’s see the following steps:
As we all know Magento 2.3.5. Has Been Officially Released today we will discuss, Step By Step Guide to Upgrade Magento 2 to 2.3.5 so let’s check all the step carefully and keep your store updated.
Step 1: Backup your Magento store
This step is very important and we recommend to not ignore this step. With backup you will protect all data from the disappearance through Backup Management if there is any issue or site is break or down.
Step 2: Update Magento 2 with composer
Magento uses Composer to manage components and their dependencies. Using Composer we can update downgrade Magento version. you need to execute below commands to update store to Magento 2.3.5.
Now time to remove cache, generation. Run the following command line at Magento root folder:
1
2
rm-rf var/di var/generation;
php bin/magento cache:flush;
Step 4: Run Upgrade Magento and Compile
Run upgrade module, database schema and compile
1
2
php bin/magento setup:upgrade;
php bin/magento setup:di:compile;
Step 5: Reindex Magento 2
You should run reindex for better performance after upgrading.
1
php bin/magento indexer:reindex
So now you can check your magento version from admin and you can also use command line for this just execute below command
1
php bin/magento--version
Webiators offer Upgrade to the latest Magento 2 version, please contact us for further information and get a free quote.
Above were the steps of updating to Magento 2.3.5 with the composer. If you find any issue while following this issue feel free to leave comments I would be glad to help you,
In this blog, we will see how the FedEx carrier is configured in Magento 2 based on eCommerce stores. Let us go through the configuring of the shipping method step by step :
Step 1: Make a Merchant Account in FedEx
Before you enable the FedEx carrier as a shipping method in your Magento 2 admin panel, you first need to create a Merchant account with the FedEx carrier services. You also need to register for FedEx Web Services Production Access.
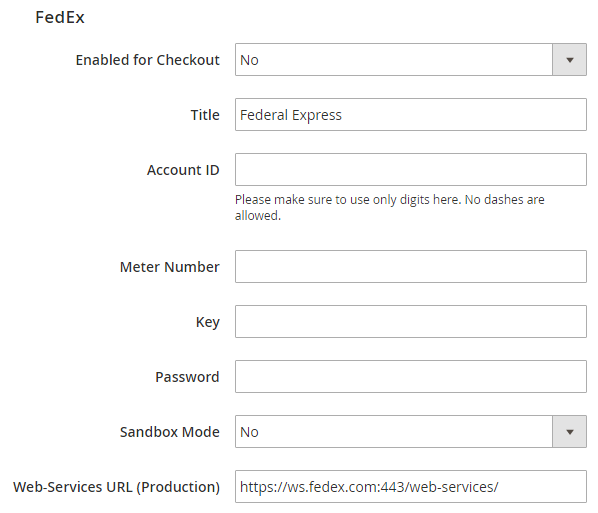
Step 2: Enable FedEx
Enabled for checkout: Select Yes to activate the FedEx carrier.
Title: Give a name to the FedEx shipping method to appear on the checkout page.
Account details: Fill the details for Account ID, Meter number, Key and Password.
Sandbox Mode: Select No to run the FedEx in a live environment
Web-Services URL: Keep the URL for FedEx web services
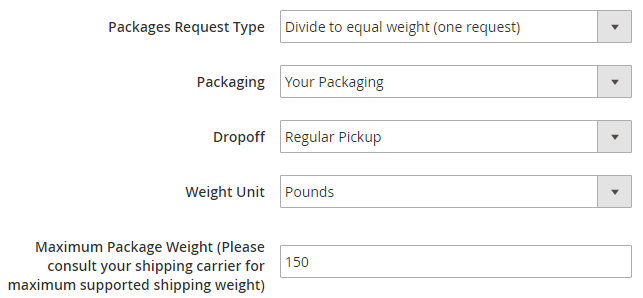
Step 3: Configure the Packaging Description
Packages Request Type: Here you get to select one option from Divide to equal weight or Use Origin Weight. Divide to Equal Weight: If the packages can be divided into equal weights, the request can be sent as one for the shipment of multiple packages.
Use Origin Weight: When the multiple packages shipment request is submitted as one.
Packaging: Here, you need to select the packaging type for the product shipment. You can select from FedEx Envelope, FedEx Pak, FedEx Box, FedEx Tube, FedEx 10kg box, FedEx 25kg box or your packaging.
Drop off: Select a method (Regular pickup, Request courier, Dropbox, Business service center and Station) from the drop-down for drop off shipments.
Weight Unit: Select a unit for the weight from the option of Kgs or
Package Weight: You can fix the maximum allowed package weight from this field. The default maximum weight mentioned is 150lbs.
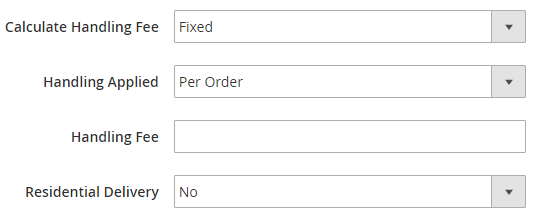
Step 4: Specify the Handling Fees
Calculate Handling Fee: Select a handling fee method from the Fixed or Percent Method.
Handling Applied: Select how to apply the selected handling fee on shipping cost either on per order or per package.
Handling Fee: Put the amount of the fee after you have selected the handling fee method.
Residential Delivery: Choose Yes or No for residential deliveries to B2C or B2B respectively.
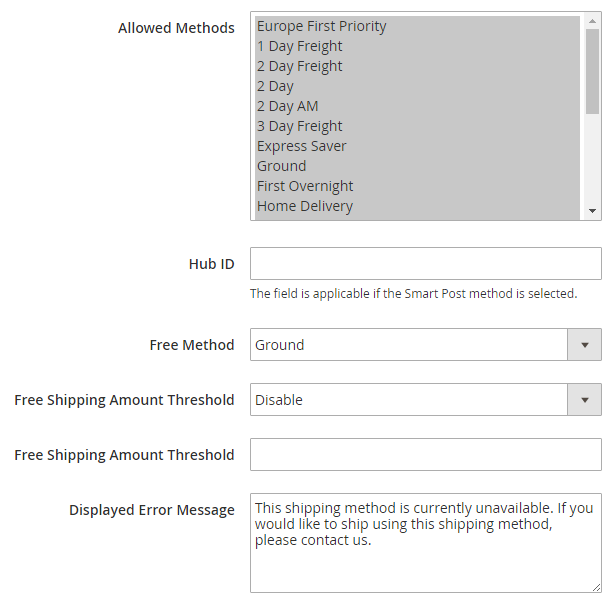
Step 5: Allocate Allowed Shipping Methods and Applicable Countries
Allowed Methods: Choose the methods which you wish to offer to your customers, from the list.
Hub ID: You need to mention the Hub ID if you have selected the Smart Post method in the above field.
Free Method: The method selected in this field will be applicable for free shipping.
Free Shipping Amount Threshold: You can apply the free shipping method for the minimum amount mentioned in this field.
Displayed Error Message: Write the message which you wish should appear when any customer selected method is not applicable to that shipment or package.
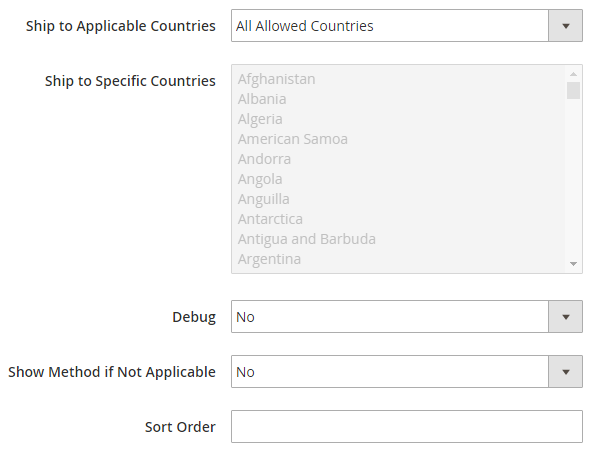
Assigning the Applicable countries:
Ship to Applicable Countries: Select any one option from All Allowed Countries orSpecific Countries.
Ship to Specific Countries: When you select Specific Countries as applicable countries, you have to select the countries manually in this field.
Debug: Select yes for this field, you want to make a log file for FedEx carrier.
Show Method if Not Applicable: You can select yes to show this shipping method even if it is not applicable for the shipment.
Sort Order: Specify the order of the FedEx carrier shipping method on the Checkout page.
This was all about the configuration process for the FedEx shipping method in Magento 2.
If you are facing any issue in any step while configuring in your store, Feel free to mention them in the comment section below. We will be happy to help you out!
Here you will learn how to configure the UPS shipping method in Magento 2. Let’s see :
Step 1: Create a UPS Shipping account
It is required to build a UPS Shipping account first before configuring this shipping method.
Step 2: Apply UPS
Navigate to Stores > Configuration> Sales> Shipping Methods> UPS.
Expand the UPS section and select your options as follows:
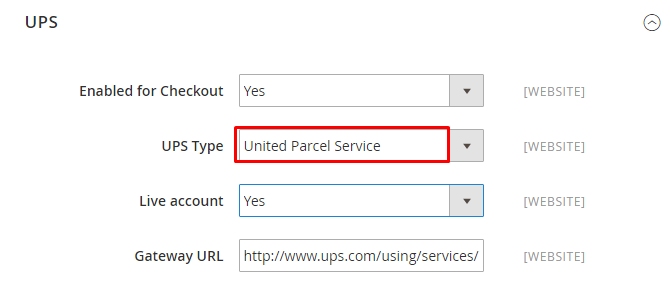
Select Enabled for Checkout option to YES.
Select the desired UPS Type. Here you have two options: United Parcel Service and United Parcel Service XML.
If you choose United Parcel Service the continue as follows:
You may choose one of the following options in the Live Account field; Select Yes instructs UPS to run in mode and present the service as a shipping option for all customers. On the other hand, Select NO lets UPS to run in test mode.
The Gateway URL is ready to use and should not be changed.
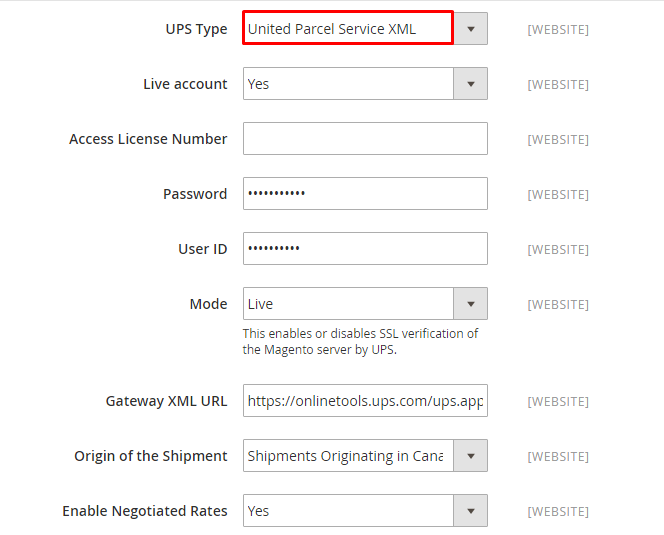
If you choose the United Parcel Service XML, continue as follows:
Enter details for your UPS XML account, that is; User ID, Password, and Access License Number.
Set the Mode to Live to allow the sending of information to the UPS shipping system.
Next, authenticate the Gateway XML URL to permit the sending of XML files.
In the Origin of the Shipment section, select where you want the shipment to receive. There are various options, and it should be easy to find one that complements your store operations.
Set the Enable Negotiated Rates to Yes. This will allow you to use customized rates with the UPS service. Consequently, enter the six-character value in the Shipper Number section.
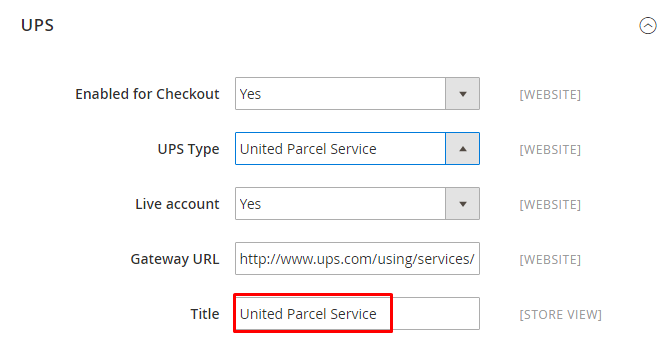
Once you set the UPS Type, enter the name of your shipping method in the Title field. The title is displayed through the checkout, if this field is neglected, United Parcel Service will display as the default title.
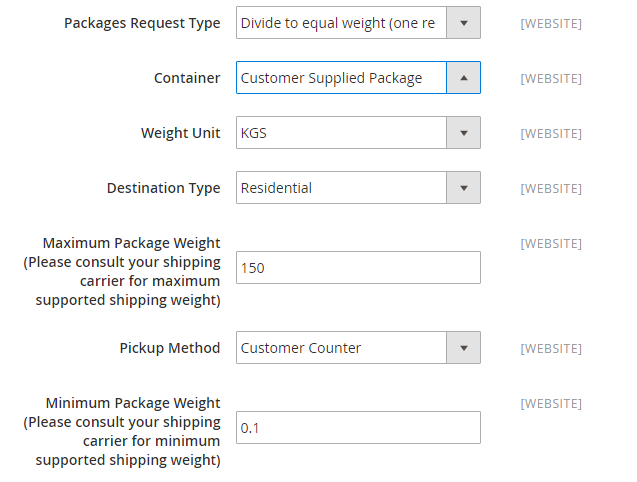
Step 3: Setup the Container Description
To complete the container description, do the following:
In the Packages Request Type, select one of the following options: Divide to equal weight (one request) or Use Origin weight (few quotes).
Next, pick the typical packaging options for the shipment in the Container field.
Select the Weight Unit, the weight can either be LBS or KGS.
Pick the preferred Destination Type. Residential is perfect if most of the shipments are B2C, and Commercial is ideal for shipments that are mostly B2B.
Consult UPS carrier for the maximum supported shipping weight before picking a value for the Maximum Package Weight.
Next set the Pickup Method, this can be Customer Counter, Letter Center, One Time Pickup, On Call Air, or Regular Daily Pickup.
Set the Minimum Package Weight, to complete the description.
Step 4: Setup the Handling Fees
Scroll down to the Calculate Handling Fee field. The handling fees can be calculated either as Fixed or Percent fees.
Next, in the Handling Applied field, set how you want the fees to be applied. The fees can be applied Per Order or Per Package. Finally, in the Handling Fee, input a value for the fee.
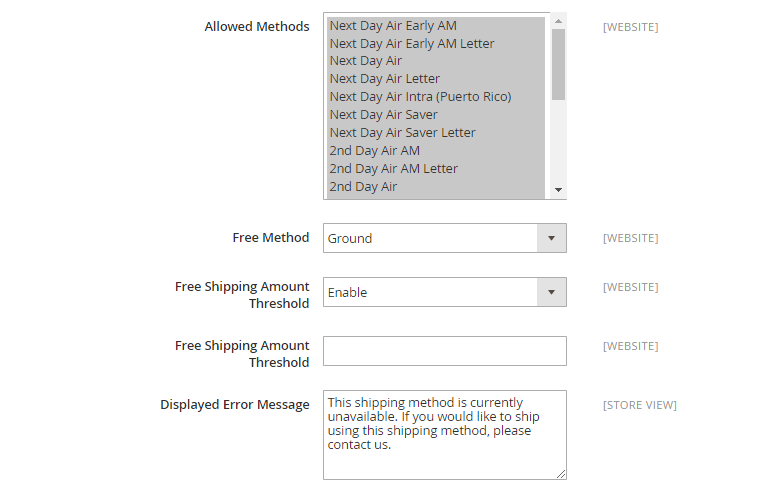
Step 5: Assigning Allowed Methods
Magento 2 gives a host of allowed UPS methods allowed to online shoppers. Select your preferred option from the Allowed Method list.
Scroll down to the Free Method option and set the desired UPS service to be applied for free shipping.
Next, in the Displayed Error Message field, enter a customized message to be displayed when the UPS shipping method is not available.
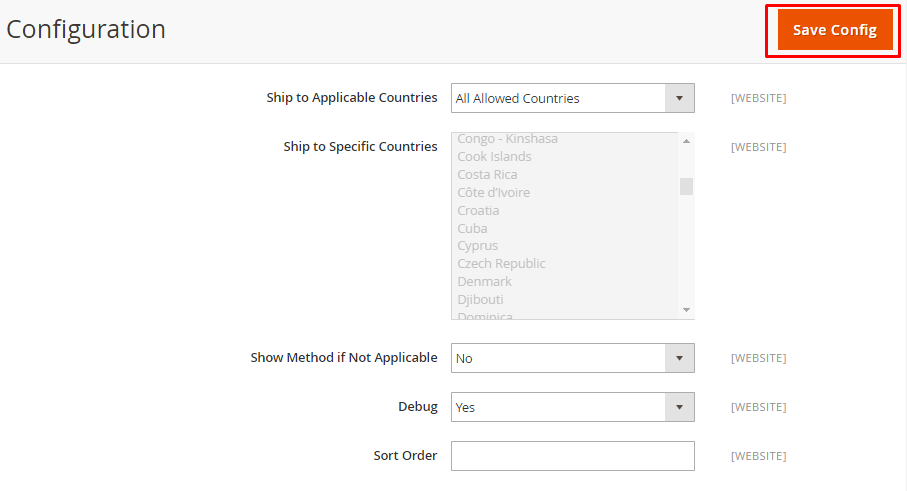
To complete the configuration, you need to set the applicable countries. Scroll down to the Ship to Applicable Countries field and set it to either All Allowed Countries Or Specific Countries. If you pick the Specific Countries option, select the applicable country in the Ship to Specific Countries field.
Finally, set the Debug to Yes. This will make it easy to create a log file featuring all the details of the UPS shipments. Complete the setup by choosing the Sort Order on your checkout page.
After complete, select save Config.
That is it!
I hope the above-specified steps help you to Configure UPS carrier in Magento 2. For any doubts, please mention them in the comment section below.
Thank you.Hit 5 Stars if you find this post helpful
CatalogPriceRules are suitable for products before they are added to the cart, while Cart Price Rules are applied in the shopping cart.
The difference between the two is that Catalog Price Rules represent promotions on category or product pages while Cart Price Rule applies promotions to the Cart in the Checkout phase. Offers like coupon code, free shipping, discounts in order total, buy 1 get 1 free, etc., are examples of Cart Price Rule.
Catalog Price Rules :
Catalog price rules can be applied to offer products to customers at a reduced price, based on a set of defined conditions. Catalog price rules do not use couponcodes, because they are triggered before a product is stored into the shopping cart.
For example, if you want to run a sale that took 20% off the “men’s Hoodie” “Women’s Tee” category – you would have to utilize a Catalog Price Rule.
When a Catalog Price Rule is active in your store, it will show up on your live site in the catalog with the discounted price next to it. This is the best way to post discounted prices, fast, across the board in your store.
With this type of pricing rule, you can only set discounts on items, and no other promotions such as free shipping.
Cart Price Rules :
Cart price rules create discounts for orders at the checkout level, based on a set of conditions. The discount can be applied automatically when the conditions are met, or be applied when the customer enters a valid coupon code. At the point when applied, the discount shows up on the shopping cart page under the subtotal.
With Cart Price Rules you can set very certain conditions for your promotions – for example, you could take $5 off the cart if certain products were included, you could run buy-one-get-one-free promotions, and you can create coupon codes.
Webiators can Install, Maintain, Migrate or Upgrade your Magento Store!CONTACT US NOW
The default Magento 2 does not allow to call $this->getUrl() method in the plugin or observer file. However, web developers, have faced the scenarios where we need to go out of our way to fulfill the crazy client requirements!
You have to pass dependency as Magento\Framework\UrlInterface to construct() method when you require to call getUrl() function of Magento 2 in plugin or observer file.
Method to fetch getUrl() in plugin or observer file in Magento 2:
1
2
3
4
5
publicfunction__construct(
\Magento\Framework\UrlInterface$urlBuilder
){
$this->urlBuilder=$urlBuilder;
}
In plugin or Observer function you can get getUrl() as:
Today we are presenting Webiators’ well-known partner – Mageplaza. Our team members are also Magento Certified developers and this to ensure our customers our professionality and quality of the work. Webiators Team is glad its Partnership Program keeps flourishing and attracting more and more Partners from all over the world.
Partnership Statement
Webiators is extremely excited to be working with Mageplaza leading extension builder for Magento 2 stores. We share our common purpose in helping clients and their businesses to achieve their dreams, and also we know that working together will bring great benefits for all the parties and grow up the world dramatically.
How Webiators x Mageplaza partnership benefits our Clients?
Webinars and Mageplaza can form a perfect combination to provide our Clients- who are running Magento eCommerce stores – the best website development service with ultimate extensions and add-on functions that most suitable for each store.
More than that, Magento 2 websites can save on cost using Webiators development services since they can have Mageplaza extensions with attractive prices for building up their online stores.
Another benefit that we both assure to our clients is that they will get the highest priority in support in any case. Clients can contact either Mageplaza or Webiators if their websites get any trouble and errors while performing. Also, we can help our customers to detect the problems and connect you with the in-charged party, which will ensure the fastest support on time.
Introducing Mageplaza
Overview
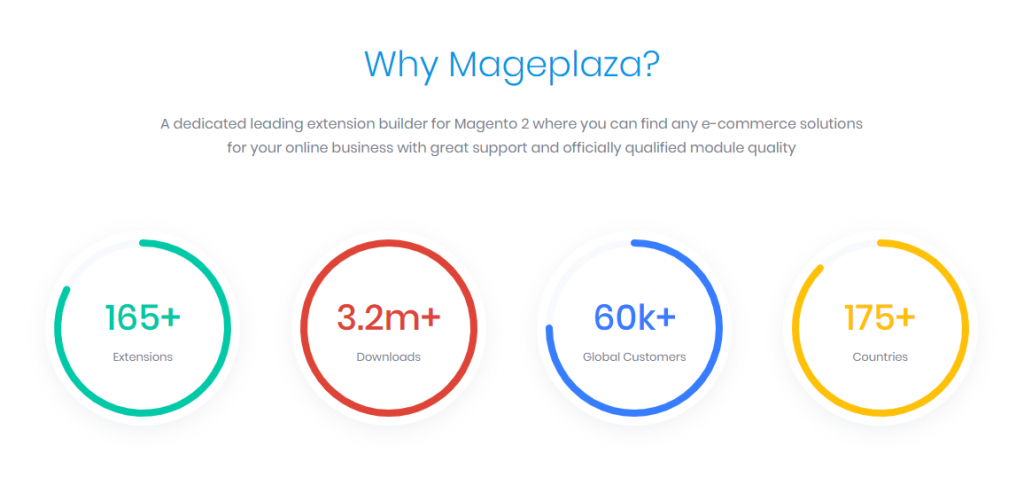
Mageplaza is a dedicated and leading company in providing Magento 2 extensions and customization services. With 5 years of development, Mageplaza has been serving 60 thousand global customers in 175 countries. We are confident and committed to providing Magento 2 stores the best quality modules and support services to help them improve and succeed with their eCommerce businesses.
Mageplaza extensions are simple to install via the composer. You can have 1-year free support with lifetime updates. Especially, Mageplaza offers up to 1-year money-back guarantee for any paid extensions. Especially, we always catch up with Magento updates and cutting edge technologies to improve our products and bring customers the best experience
Product Range
Mageplaza extensions can fulfill any eCommerce Magento stores with a wide range of solutions:
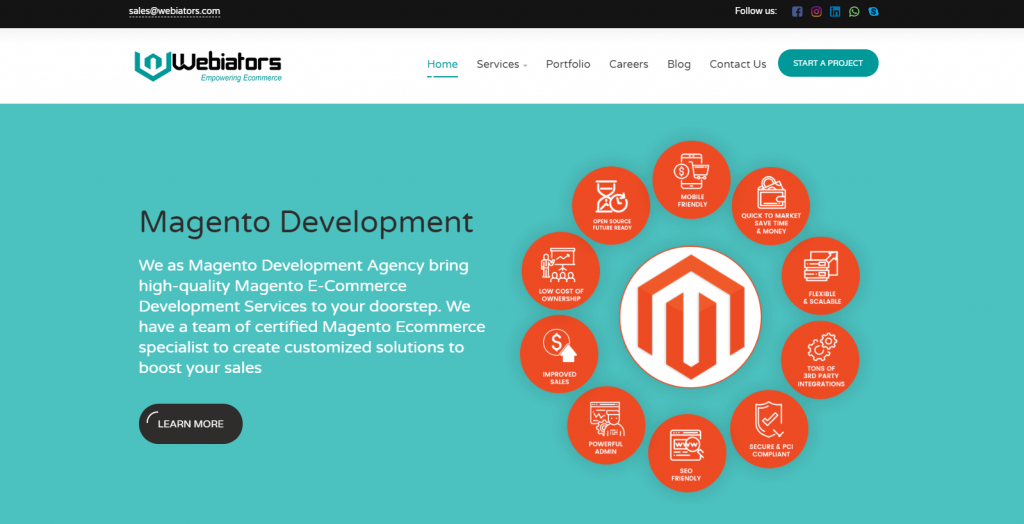
Founded in 2017 with a vision to passionately fulfill the digital needs of every individual, Webiators has remarkably set footprint in the Ecommerce world. Webiators is a leading Magento development company that delivers high-class Magento development solutions for stores worldwide. Webiators constantly strive to serve best offers to store migration, customization, extension development, upgrade to marketing and SEO by working with Magento’s versions.
Our development agency master in various technologies such as Magento, Shopify, WordPress, PHP, and many more. Also, Webiators are always ready for more enormous challenges and immediate problem-solving.
Products And Services
Webiators provides a wide range of products and services. You can find any solutions with Webiators agency: