Here you will learn how to configure the UPS shipping method in Magento 2. Let’s see :
Step 1: Create a UPS Shipping account
It is required to build a UPS Shipping account first before configuring this shipping method.
Step 2: Apply UPS
Navigate to Stores > Configuration > Sales > Shipping Methods > UPS.
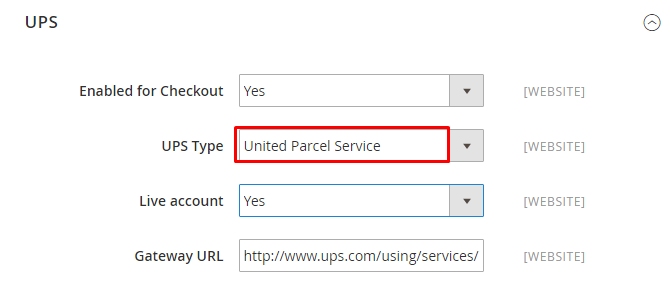
Expand the UPS section and select your options as follows:
- Select Enabled for Checkout option to YES.
- Select the desired UPS Type. Here you have two options: United Parcel Service and United Parcel Service XML.
If you choose United Parcel Service the continue as follows:
- You may choose one of the following options in the Live Account field; Select Yes instructs UPS to run in mode and present the service as a shipping option for all customers. On the other hand, Select NO lets UPS to run in test mode.
- The Gateway URL is ready to use and should not be changed.
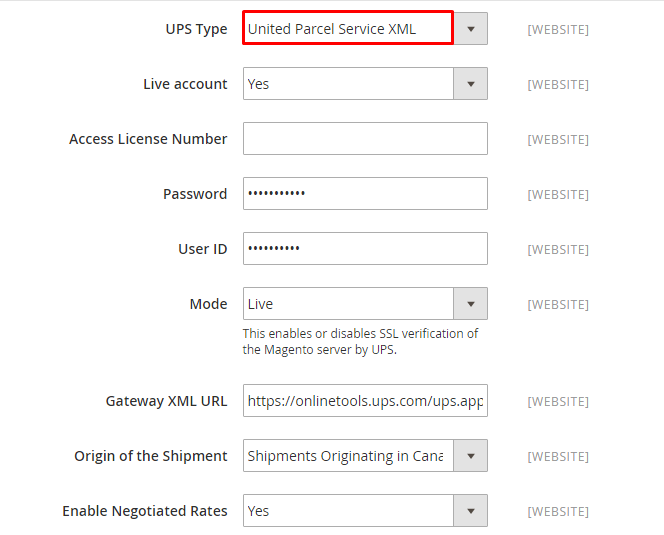
If you choose the United Parcel Service XML, continue as follows:
- Enter details for your UPS XML account, that is; User ID, Password, and Access License Number.
- Set the Mode to Live to allow the sending of information to the UPS shipping system.
- Next, authenticate the Gateway XML URL to permit the sending of XML files.
- In the Origin of the Shipment section, select where you want the shipment to receive. There are various options, and it should be easy to find one that complements your store operations.
- Set the Enable Negotiated Rates to Yes. This will allow you to use customized rates with the UPS service. Consequently, enter the six-character value in the Shipper Number section.
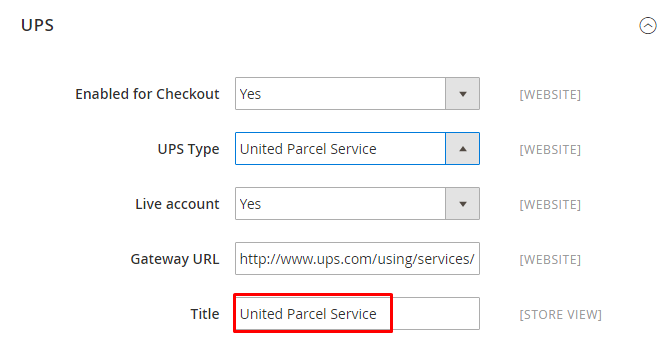
Once you set the UPS Type, enter the name of your shipping method in the Title field. The title is displayed through the checkout, if this field is neglected, United Parcel Service will display as the default title.
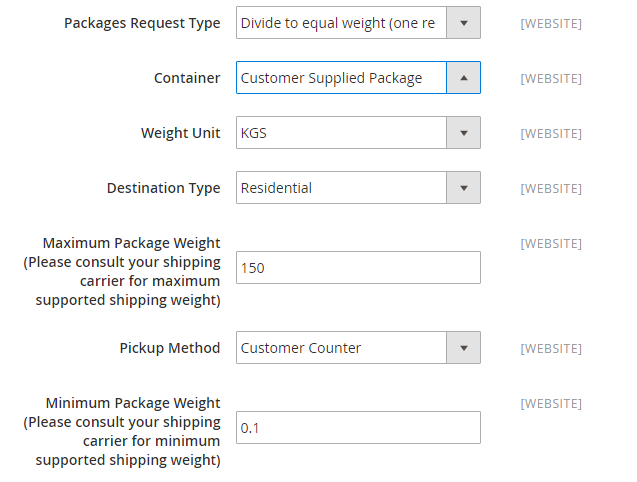
Step 3: Setup the Container Description
To complete the container description, do the following:
- In the Packages Request Type, select one of the following options: Divide to equal weight (one request) or Use Origin weight (few quotes).
- Next, pick the typical packaging options for the shipment in the Container field.
- Select the Weight Unit, the weight can either be LBS or KGS.
- Pick the preferred Destination Type. Residential is perfect if most of the shipments are B2C, and Commercial is ideal for shipments that are mostly B2B.
- Consult UPS carrier for the maximum supported shipping weight before picking a value for the Maximum Package Weight.
- Next set the Pickup Method, this can be Customer Counter, Letter Center, One Time Pickup, On Call Air, or Regular Daily Pickup.
- Set the Minimum Package Weight, to complete the description.
Step 4: Setup the Handling Fees
Scroll down to the Calculate Handling Fee field. The handling fees can be calculated either as Fixed or Percent fees.
Next, in the Handling Applied field, set how you want the fees to be applied. The fees can be applied Per Order or Per Package. Finally, in the Handling Fee, input a value for the fee.

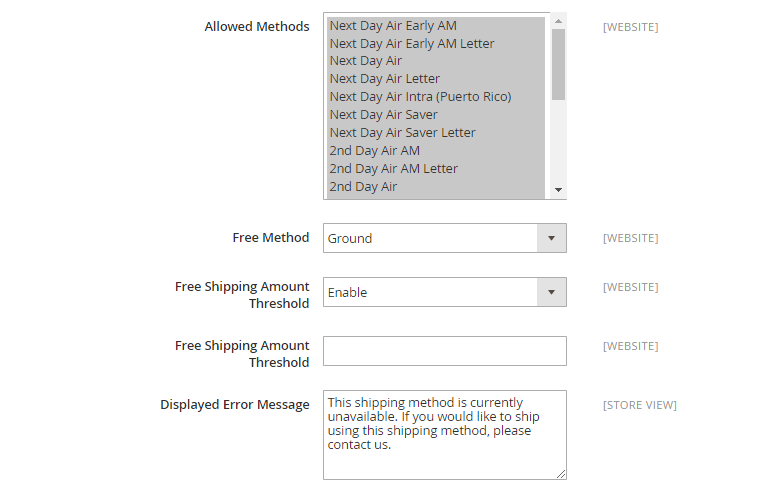
Step 5: Assigning Allowed Methods
- Magento 2 gives a host of allowed UPS methods allowed to online shoppers. Select your preferred option from the Allowed Method list.
- Scroll down to the Free Method option and set the desired UPS service to be applied for free shipping.
- Next, in the Displayed Error Message field, enter a customized message to be displayed when the UPS shipping method is not available.
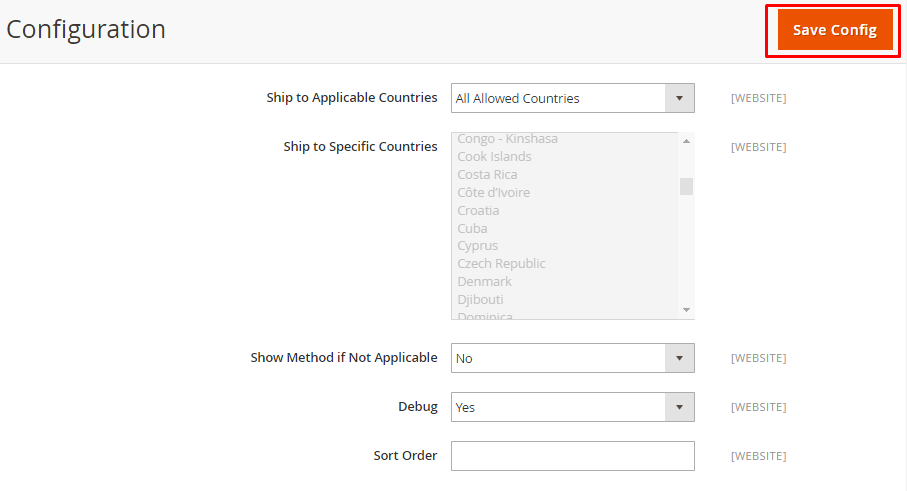
To complete the configuration, you need to set the applicable countries. Scroll down to the Ship to Applicable Countries field and set it to either All Allowed Countries Or Specific Countries. If you pick the Specific Countries option, select the applicable country in the Ship to Specific Countries field.
Finally, set the Debug to Yes. This will make it easy to create a log file featuring all the details of the UPS shipments. Complete the setup by choosing the Sort Order on your checkout page.
After complete, select save Config.
That is it!
I hope the above-specified steps help you to Configure UPS carrier in Magento 2. For any doubts, please mention them in the comment section below.
Thank you.Hit 5 Stars if you find this post helpful
