Categories are classes or things which are related, and have some shared characteristics. The following steps describe how to add categories for the products in Magento.
Step 1 − Login to your Magento Admin Panel.
Step 2 − Go to the Catalog menu and click on the Categories option.
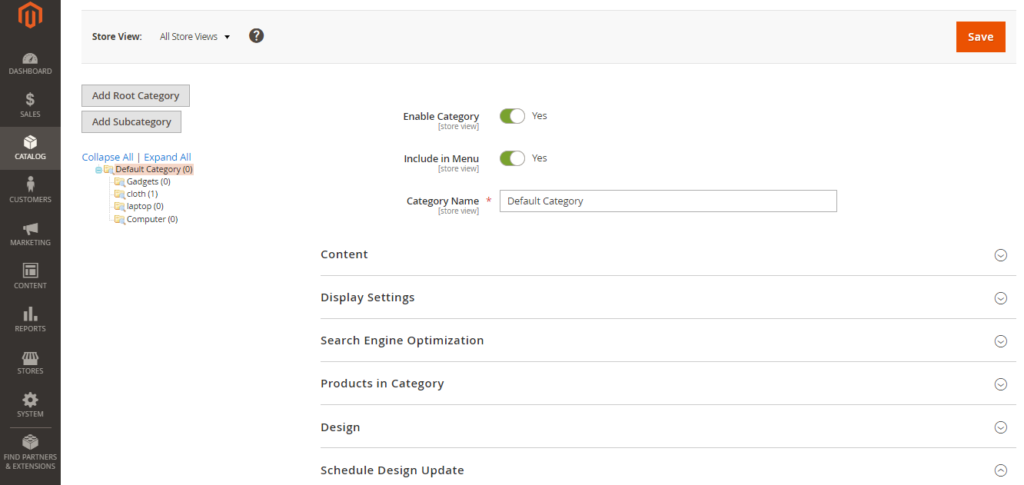
Step 3 – Complete the Basic Information.
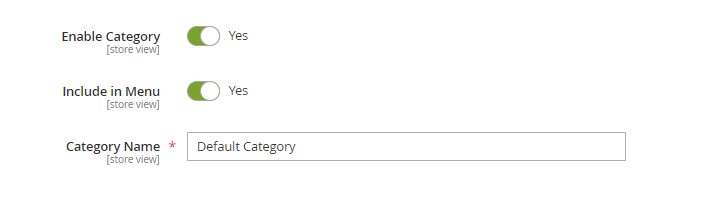
1. If you want the category to be immediately available in the store, set Enable Category to Yes.
2. To include the category in the top navigation, set Include in Menu to Yes.
3. Enter the Category Name.
4.Click Save and continue.
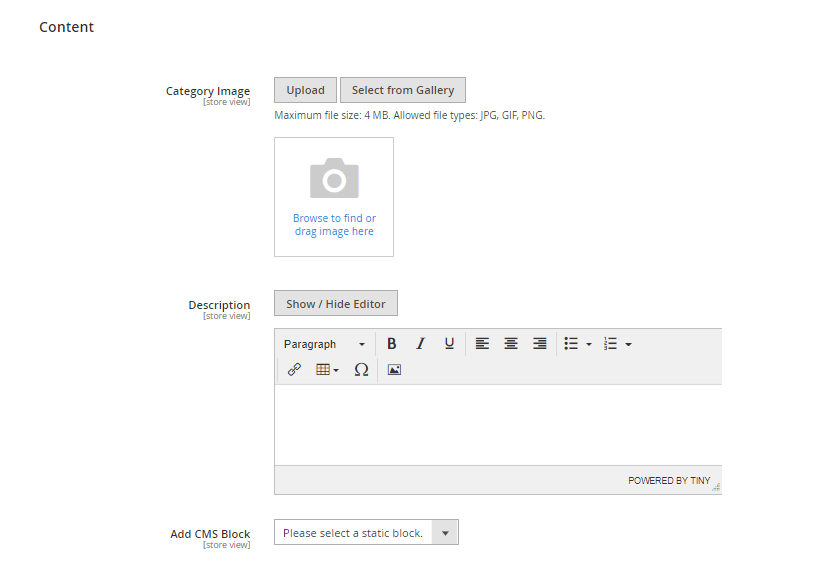
Step 4 – Complete the Category Content.
1. Expand the Content section.
2. To display a Category Image at the top of the page, you can either upload your own image or use an image that already exists in your Media Storage.
- To upload your own image, click Upload. Then, choose the image that you want to represent the category.
- To use images from your Media Storage , click Select from Gallery. Then, select the image you want to represent the category.
3. In the Description box, enter the text that you want to appear on the category landing page. Then, format the text as needed.
4. To include a content block on the category landing page, choose the CMS Block that you want to appear.
5. Click Save and continue.
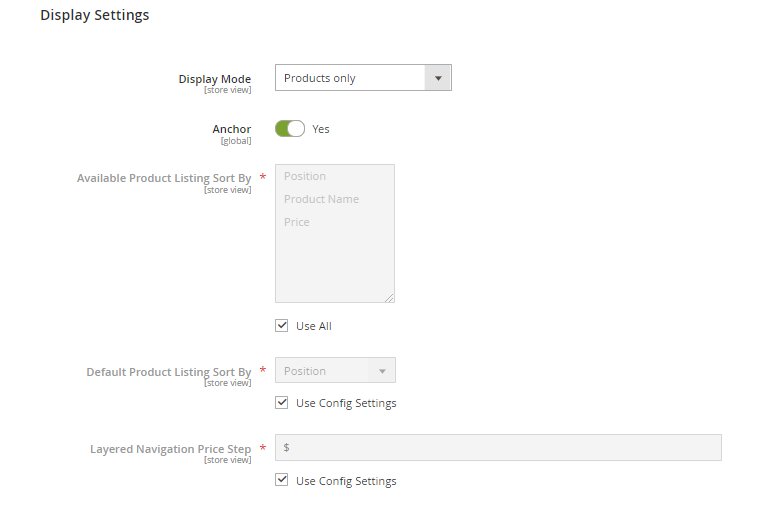
Step 5 – Complete the Display Settings.
1. Expand the Display Settings section.
2. Set Display Mode to one of the following:
- Products Only
- Static Block Only
- Static Block and Products
3. If you want the category page to include the “Filter by Attribute” section of layered navigation, set Anchor to Yes.
4. To change the Available Product Listing Sort By options, do the following:
- Clear the Use All checkbox.
- Select one or more of the available values to be available for customers to sort the list. By default, all available values are included. For example, the values might include:
- Position
- Product Name
- Price
5. To set the default sort order for the category, choose the Default Product Listing Sort By value.
6. To change the default layered navigation setting, do the following:
- Clear the Use Config Settings checkbox.
- Enter the value to be used as an incremental price step for layered navigation.
7. Click Save and continue.
Step 6 – Complete the Search Engine Optimization Settings.
1. Expand the Search Engine Optimization Settings section.
2. Complete the following meta data for the category:
- Meta Title
- Meta Keywords
- Meta Description
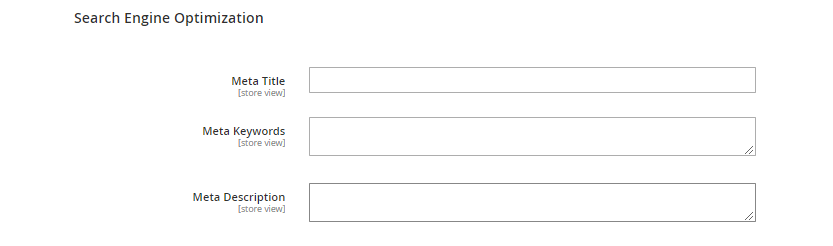
3. Click Save and continue.
Step 7 – Choose the Products in Category.
- Expand the Products in Category section. Then, use one of the following methods to add products to the category.
- Use the filters as needed to find the products.To display all records that are not yet included in the category, set the record chooser in the first column to `No and click Search.
- In the first column, select the checkbox for each product to include in the category.
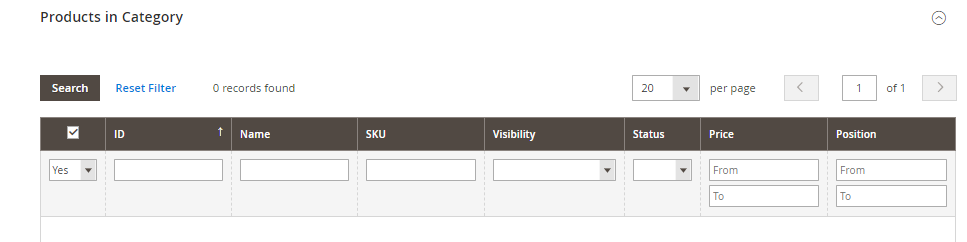
4. Click Save and continue.
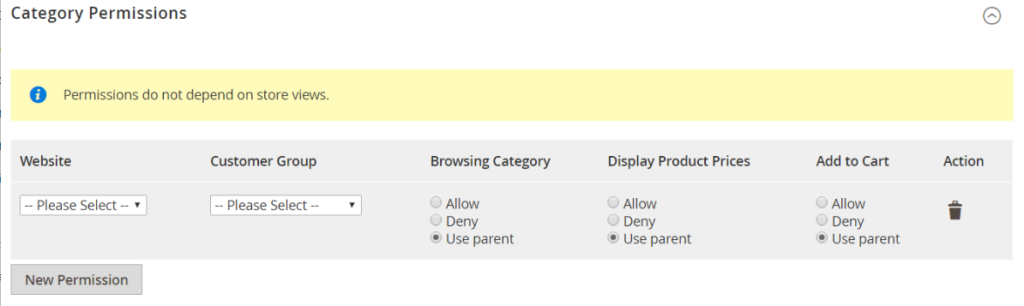
Step 8 – Set Category Permissions.
1. Expand the Category Permissions section. Then, do the following:
- For a multisite installation, choose the Website where the category permissions apply.
- Choose the Customer Group or Shared Catalog where the category permissions apply.
- Set the following permissions as needed:
- Browsing Category
- Display Product Prices
- Add to Cart
2. To add another permission rule, click New Permission. Then repeat the process.
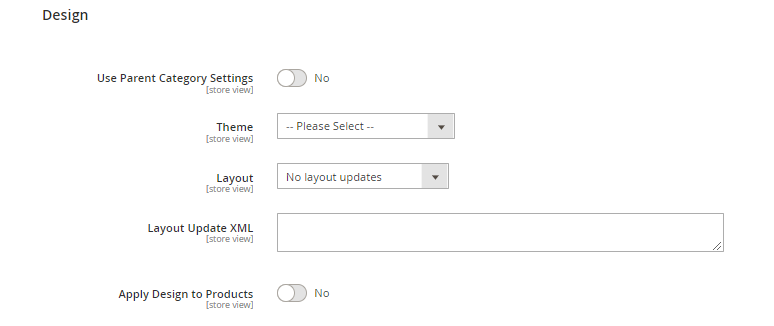
Step 9 – Complete the Design Settings.
1. Expand the Design section. Then, do the following:
- To change the design of the category pages, choose the Theme that you want to apply.
- To change the column layout of the category pages, choose the Layout that you want to apply.
- To enter custom code, enter valid XML code in the Layout Update XML box.
- To use the same design for product pages, set Apply Design to Products to
Yes.
2. When complete, click Save.
